Back to: Advanced Physical Security Integration (APSI)
0
Lesson 3.2: Image Quality Configuration
Module: 3 – Video Surveillance (VMS & CCTV) Prerequisites: Lesson 3.1 (Camera Hardware) Estimated Time: 45–60 Minutes
1. Learning Objectives
By the end of this lesson, you will be able to:
- Configure Shutter Speed to prevent “Ghosting” on moving objects (crucial for License Plate Recognition).
- Manage Wide Dynamic Range (WDR) to fix backlit scenes without introducing artifacts.
- Balance Frame Rate (FPS) and Keyframe Intervals (GOV) to maximize storage retention.
- Explain the trade-off between Depth of Field and Low Light performance (Aperture).
2. Shutter Speed: The “Motion Freezer”
This is the #1 setting ignored by technicians, leading to useless footage.
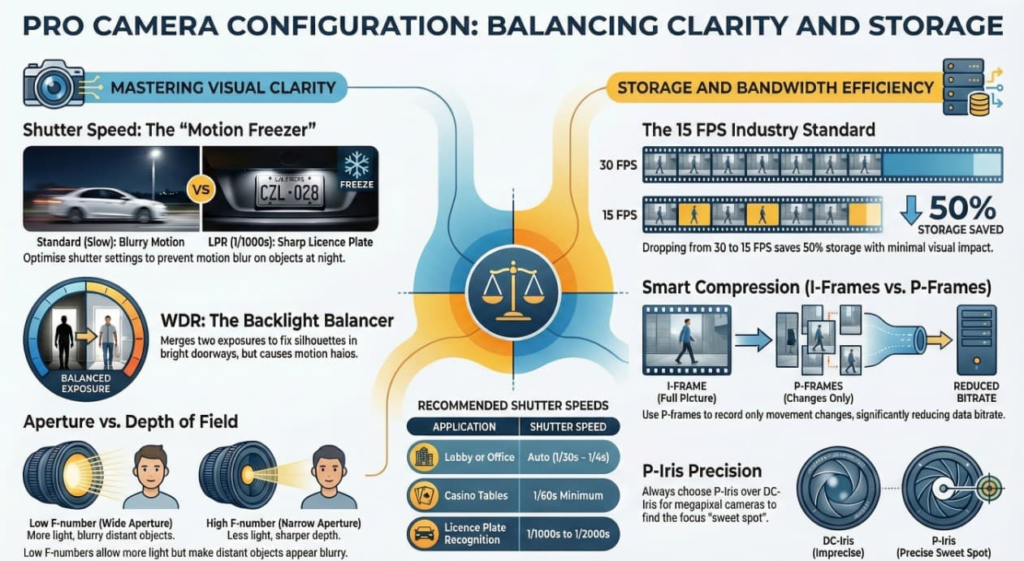
- The Concept: Shutter speed controls how long the sensor is “open” to catch light.
- Slow Shutter (1/30s): The sensor is open longer.
- Result: Brighter image, but fast-moving objects become blurry streaks (“Ghosting”).
- Fast Shutter (1/1000s): The sensor snaps quickly.
- Result: Freezes motion perfectly, but the image is darker (less time to catch light).
- Slow Shutter (1/30s): The sensor is open longer.
- The Application:
- Lobby/Office: Leave at default (auto 1/30s – 1/4s).
- License Plate Recognition (LPR): You MUST force the shutter to 1/1000s or 1/2000s. If you leave an LPR camera on “Auto,” the plate will be a white blur at night.
- Casino tables/Fast Hands: 1/60s minimum.
3. Wide Dynamic Range (WDR): The “Balancer”
- The Problem: You point a camera at a glass entry door. The sun is bright outside, but the lobby is dim. The camera adjusts to the sun, making the person walking in look like a black silhouette.
- The Solution (WDR):
- The camera takes two photos at once: one with a fast shutter (for the bright window) and one with a slow shutter (for the dark person).
- It digitally merges them into one balanced image.
- The Trade-off (The “WDR Ghost”):
- Because it combines two frames taken milliseconds apart, if the person is running, the two images won’t align perfectly. You get a weird “halo” or blur around them.
- Rule: Turn WDR OFF for LPR or fast-traffic areas. Turn it ON for lobbies and entrances.
4. Aperture & Iris: The “Pupil”
The Iris controls the hole in the lens (F-Stop).
- Low F-Number (F1.2): Big hole. Lots of light.
- Side Effect: Shallow Depth of Field. The person 10ft away is sharp, but the person 20ft away is blurry.
- High F-Number (F2.0+): Small hole. Less light.
- Side Effect: Deep Depth of Field. Everything from 5ft to 50ft is in focus.
P-Iris (Precise Iris): Modern high-end cameras use P-Iris. A motor sets the iris to the exact “sweet spot” for clarity, rather than just forcing it wide open. Always choose P-Iris over DC-Iris for megapixel cameras.
5. Frame Rate (FPS) & Bandwidth
- The Myth: “We need 30 FPS for smooth video.”
- The Reality: Hollywood movies are shot at 24 FPS.
- 15 FPS: The Industry Standard. It looks fluid to the human eye and saves 50% storage compared to 30 FPS.
- 30-60 FPS: Only use for Casinos (counting cards) or License Plates (fast cars).
- 7-10 FPS: Fine for empty hallways or perimeter fences.
6. Compression: I-Frames vs. P-Frames
To save space, cameras don’t save a full photo 15 times a second. They use compression (H.264/H.265).
- I-Frame (Intra-frame): A full, complete picture (High data).
- P-Frame (Predicted frame): Only records what changed since the last frame (Low data).
- Example: In an empty hallway, the walls don’t move. The P-frame says “Repeat the walls,” saving massive space.
- GOV (Group of Video) / I-Frame Interval:
- This setting tells the camera: “Send a full I-Frame every X seconds.”
- Standard: Every 1 or 2 seconds.
- Smart Codecs (Zipstream): They dynamically delay the I-Frame when nothing is happening, dropping bitrate to almost zero.