Back to: Advanced Physical Security Integration (APSI)
0
Lesson 9.3: Installation Best Practices & Commissioning
Module: 9 – Project Management & Lifecycle Prerequisites: Lesson 9.2 (System Design) Estimated Time: 45–60 Minutes
1. Learning Objectives
By the end of this lesson, you will be able to:
- Demonstrate proper cable management techniques (“Dressing”) inside the rack to ensure serviceability.
- Execute a systematic “Focus & Aim” procedure to avoid the dreaded “go-back” trip.
- Perform a full Commissioning Test (“The Walk Test”) to verify motion detection and recording.
- Create an “As-Built” document package for the final client sign-off.
2. Rack & Cable Management (The “Service Loop”)
The difference between a “Trunk Slammer” and a Professional is the back of the rack.
The Rules of Dressing:
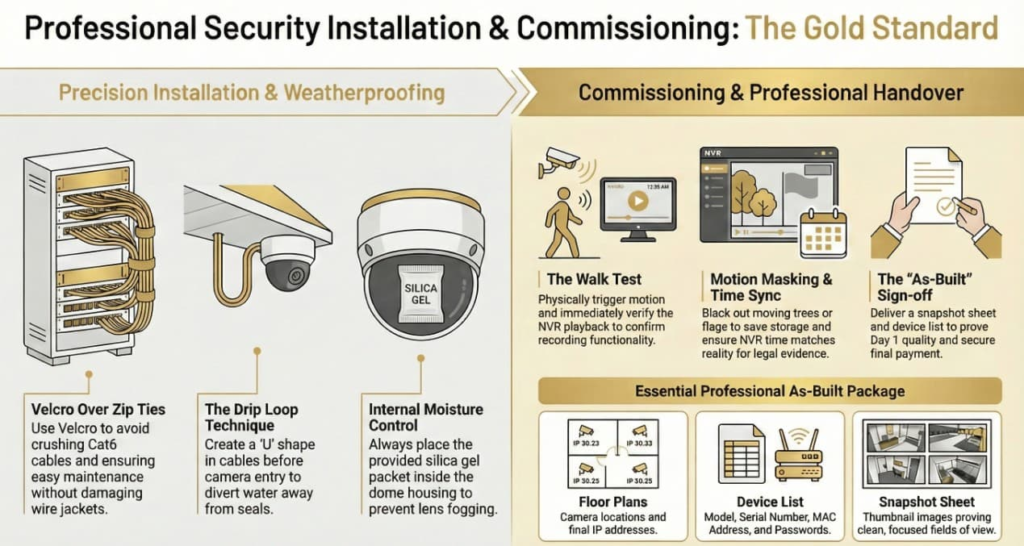
- Velcro, Not Zip Ties: Inside the rack, use Velcro. Zip ties can crush Cat6 cables (changing their impedance) and are a nightmare to cut off during service calls.
- The Service Loop: Always leave 3–5 feet of extra cable slack at the rack end, coiled neatly in the vertical manager or above the ceiling.
- Why: If you need to move the rack or re-terminate a bad jack later, you have slack to work with.
- Labeling:Label BOTH ends of the wire.
- Camera End: Label the wire “Cam 01” before you plug it in.
- Patch Panel End: Label the jack “Cam 01.”
- Switch End: Label the patch cord “Cam 01.”
- Result: 5 years later, the tech knows exactly which cable goes to the Loading Dock.
3. Camera Mounting & Weatherproofing
Water is the enemy.
The Drip Loop:
- Concept: Never let a wire run straight down into a device. Water will follow the wire like a slide and go right into the port.
- Technique: Create a “U” shape in the wire just before it enters the camera. Water runs down, hits the bottom of the “U,” and drips off away from the seal.
Grommets & Silica:
- Grommet: The rubber seal on the camera pigtail. If you don’t tighten it, spiders will nest inside and short the pins.
- Silica Packet: Most cameras come with a little bag of silica gel. Do not throw it away. Put it inside the dome housing. It absorbs moisture and prevents fogging/condensation on the lens.
4. Focus & Aim (The “Day 1” Image)
Just because the camera is up doesn’t mean it’s done.
The “Helper” App:
- Most professional brands (Axis, Hanwha) have a Wi-Fi dongle or app that lets you see the camera view on your phone while standing on the ladder.
- Process:
- Level the horizon (fix the “Dutch Angle”).
- Zoom to the “Operational Requirement” (Lesson 9.1). Don’t just show “the room”—show “the door.”
- Focus: Even with Auto-Focus, force a “One-Push Focus” after the dome bubble is installed. (The plastic bubble can shift focus slightly).
WDR Setup:
- If the camera faces a window, the image will be dark (silhouette).
- Action: Turn WDR (Wide Dynamic Range) ON. It balances the bright sunlight and the dark room.
5. Commissioning (The “Walk Test”)
You cannot invoice until you prove it works.
The Verification List:
- Field of View: Does it match the drawing?
- Recording Check:
- Action: Wave your hand in front of the camera.
- Verification: Go to the NVR. Playback the video from 2 minutes ago. Did it record?
- Motion Masking:
- Action: Check for moving trees/flags in the view.
- Configuration: “Mask” (black out) those areas in the motion settings so they don’t fill the hard drive with false recordings.
- Time Sync: Ensure the NVR time matches the actual time. (Critical for legal evidence).
6. The “As-Built” Package
This is what you hand the client to get paid.
- Floor Plans: A map showing exactly where Camera 01, 02, etc., are located (with their final IP addresses written next to them).
- Device List (Spreadsheet):
- Camera Name | Model | Serial Number | IP Address | MAC Address | Password.
- Snapshot Sheet: A PDF showing a thumbnail image from every camera view. This proves the cameras were focused and clean on Day 1.
- Training: A 15-minute session teaching the client how to “Search, Playback, and Export” video.